
Nội dung chính
Tổng quan#
Load balancing là kỹ thuật phân phối tải trên các web site có lượng truy cập cao. Giải pháp hỗ trợ việc tối ưu hóa tài nguyên, tăng sự đảm bảo, giảm độ trễ trên hệ thống.
Các thuật toán cân bằng tải cơ bản:
- Round Robin: Các Request phân phối tuần tự tới các server, phương thức được sử dụng mặc định.
- Least Connection: Request phân phối tới server có số kết nối tới ít nhất.
- IP Hash: Lựa chọn Kết nối tới server bằng IP kết nối tới, tức IP A sẽ luôn kết nối tới server A trừ khi server A xảy ra sự cố.
Phần 1. Chuẩn bị#
Truy cập Nhân hòa, đăng ký 3 Máy ảo CentOS 7 với cấu hình 2 CPU, 2GB RAM – 25 GB Disk (Cấu hình gói B) 
Kết quả sau khi đăng ký dịch vụ 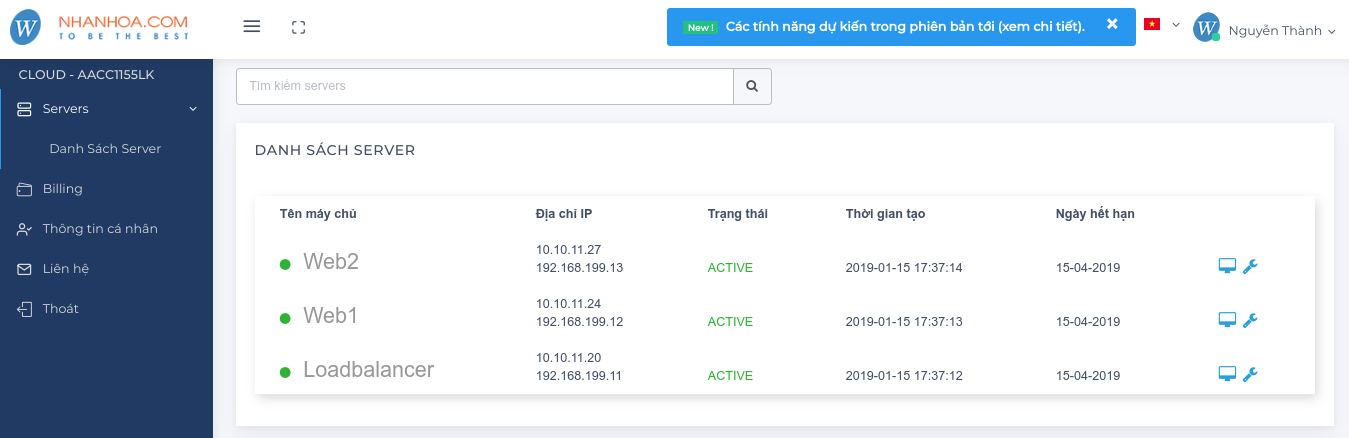
Phân hoạch

Mô hình

Thiết lập ban đầu
Tại node loadbalancer
Thiết lập hostname, cập nhật hệ thống
hostnamectl set-hostname loadbalancer
yum update -y
Tắt Firewall và SELinux
sed -i 's/SELINUX=enforcing/SELINUX=disabled/g' /etc/sysconfig/selinux
sed -i 's/SELINUX=enforcing/SELINUX=disabled/g' /etc/selinux/config
systemctl stop firewalld
systemctl disable firewalld
Cấu hình Host file
echo "192.168.199.11 loadbalancer" >> /etc/hosts
echo "192.168.199.12 web1" >> /etc/hosts
echo "192.168.199.13 web2" >> /etc/hosts
Khởi động lại hệ thống
init 6
Tại node web1
Thiết lập hostname, cập nhật hệ thống
hostnamectl set-hostname web1
yum update -y
Tắt Firewall và SELinux
sed -i 's/SELINUX=enforcing/SELINUX=disabled/g' /etc/sysconfig/selinux
sed -i 's/SELINUX=enforcing/SELINUX=disabled/g' /etc/selinux/config
systemctl stop firewalld
systemctl disable firewalld
Cấu hình Host file
echo "192.168.199.11 loadbalancer" >> /etc/hosts
echo "192.168.199.12 web1" >> /etc/hosts
echo "192.168.199.13 web2" >> /etc/hosts
Khởi động lại hệ thống
init 6
Tại node web2
Thiết lập hostname, cập nhật hệ thống
hostnamectl set-hostname web2
yum update -y
Tắt Firewall và SELinux
sed -i 's/SELINUX=enforcing/SELINUX=disabled/g' /etc/sysconfig/selinux
sed -i 's/SELINUX=enforcing/SELINUX=disabled/g' /etc/selinux/config
systemctl stop firewalld
systemctl disable firewalld
Cấu hình Host file
echo "192.168.199.11 loadbalancer" >> /etc/hosts
echo "192.168.199.12 web1" >> /etc/hosts
echo "192.168.199.13 web2" >> /etc/hosts
Khởi động lại hệ thống
init 6
Phần 2. Cài đặt#
Bước 1: Cài đặt Nginx
Thực hiện tại node loadbalancer
Lưu ý:
- Cài đặt Nginx từ source đễ hỗ trợ bổ sung thêm các module không có sẵn (vts, sts, stream sts không có sẵn trên repository mặc định)
- Bổ sung thêm các gói giám sát traffic, mục địch phục vụ bài toán giám sát load balancing trên Nginx
Bổ sung bộ biên dịch
yum -y install gcc gcc-c++ \
make zlib-devel pcre-devel \
openssl-devel git wget \
geoip-devel epel-release
Cài đặt gói vts, sts, stream sts
mkdir /opt/downloads
cd /opt/downloads

# vts
git clone https://github.com/vozlt/nginx-module-vts.git

# sts
git clone https://github.com/vozlt/nginx-module-sts.git

# stream sts
git clone https://github.com/vozlt/nginx-module-stream-sts.git
Lưu ý:
- Các gói vts, sts, stream sts hỗ trợ tốt các phiển bản nginx từ 1.15.0 trở xuống, ở docs ta sẽ sử dụng 1.13.0
Tải mã nguồn nginx
cd /opt/downloads
wget http://nginx.org/download/nginx-1.13.0.tar.gz
tar -zxf nginx-1.13.0.tar.gz
cd nginx-1.13.0
Biên dịch
./configure --user=nginx --group=nginx \
--add-module=/opt/downloads/nginx-module-sts/ \
--add-module=/opt/downloads/nginx-module-vts/ \
--add-module=/opt/downloads/nginx-module-stream-sts/ \
--prefix=/etc/nginx \
--sbin-path=/usr/sbin/nginx \
--conf-path=/etc/nginx/nginx.conf \
--error-log-path=/var/log/nginx/error.log \
--http-log-path=/var/log/nginx/access.log \
--pid-path=/var/run/nginx.pid \
--lock-path=/var/run/nginx.lock \
--http-client-body-temp-path=/var/cache/nginx/client_temp \
--http-proxy-temp-path=/var/cache/nginx/proxy_temp \
--http-fastcgi-temp-path=/var/cache/nginx/fastcgi_temp \
--http-uwsgi-temp-path=/var/cache/nginx/uwsgi_temp \
--http-scgi-temp-path=/var/cache/nginx/scgi_temp \
--with-http_ssl_module \
--with-http_realip_module \
--with-http_addition_module \
--with-http_sub_module \
--with-http_dav_module \
--with-http_gunzip_module \
--with-http_gzip_static_module \
--with-http_random_index_module \
--with-http_secure_link_module \
--with-http_stub_status_module \
--with-mail \
--with-mail_ssl_module \
--with-file-aio \
--with-stream \
--with-http_geoip_module

make
make install
Tạo user nginx và thư mục chứa cache nginx, phân quyền lại thư mục
useradd -r nginx
mkdir -p /var/cache/nginx/client_temp/
chown nginx. /var/cache/nginx/client_temp/
Tạo service systemd cho nginx
echo '[Unit]
Description=The NGINX HTTP and reverse proxy server
After=syslog.target network.target remote-fs.target nss-lookup.target

[Service]
Type=forking
PIDFile=/run/nginx.pid
ExecStartPre=/usr/sbin/nginx -t
ExecStart=/usr/sbin/nginx
ExecReload=/bin/kill -s HUP $MAINPID
ExecStop=/bin/kill -s QUIT $MAINPID
PrivateTmp=true

[Install]
WantedBy=multi-user.target' > /lib/systemd/system/nginx.service
Phân quyền service systemd nginx
chmod a+rx /lib/systemd/system/nginx.service
Chạy dịch vụ
systemctl start nginx
systemctl enable nginx
Cấu hình Load Balancing cho nginx
cp /etc/nginx/nginx.conf /etc/nginx/nginx.conf.bak
rm -rf /etc/nginx/nginx.conf

echo '
#user  nobody;
worker_processes  1;

#error_log  logs/error.log;
#error_log  logs/error.log  notice;
#error_log  logs/error.log  info;

#pid        logs/nginx.pid;


events {
    worker_connections  1024;
}

http {
    include       mime.types;
    default_type  application/octet-stream;
    # Stream traffic module
    stream_server_traffic_status_zone;

    # Stream web module
    vhost_traffic_status_zone;

    # filter geoip
    geoip_country /usr/share/GeoIP/GeoIP.dat;
    vhost_traffic_status_filter_by_set_key $geoip_country_code country::*;


    sendfile        on;
    #tcp_nopush     on;

    #keepalive_timeout  0;
    keepalive_timeout  65;

    #gzip  on;

    upstream backend {
        server 192.168.199.12:80;
        server 192.168.199.13:80;
    }

    server {
        listen 10.10.11.20:80;

        location / {
            proxy_pass http://backend;
        }
    }

    server {
        listen       8080;
        server_name  status-page;

        location / {
            root   html;
            index  index.html index.htm;
        }

        location /status-stream {
            stream_server_traffic_status_display;
            stream_server_traffic_status_display_format html;
        }

        vhost_traffic_status_filter_by_set_key $geoip_country_code country::$server_name;

        location /status-web {
            vhost_traffic_status_display;
            vhost_traffic_status_display_format html;
        }

        error_page   500 502 503 504  /50x.html;
        location = /50x.html {
            root   html;
        }

    }
}' > /etc/nginx/nginx.conf
Lưu ý:
- Module
upstream: Module load balancing theo thuật toánround robin - Cấu hình cân bằng tải
upstream backend { server 192.168.199.12:80; server 192.168.199.13:80; }- Các server được nhóm lại bằng
upstreammodule, định nghĩa bằngserverdirective
- Các server được nhóm lại bằng
Cấu hình chuyển request tới server group, ở đẩy ta sẽ dùng proxy_pass directive
server {
    listen 10.10.11.20:80;

    location / {
        proxy_pass http://backend;
    }
}
Khởi động lại dịch vụ
systemctl restart nginx
Bước 2: Cài đặt Apache
Thực hiện tại web1
yum install httpd -y
cat /etc/httpd/conf/httpd.conf | grep 'Listen 80'
sed -i "s/Listen 80/Listen 192.168.199.12:80/g" /etc/httpd/conf/httpd.conf
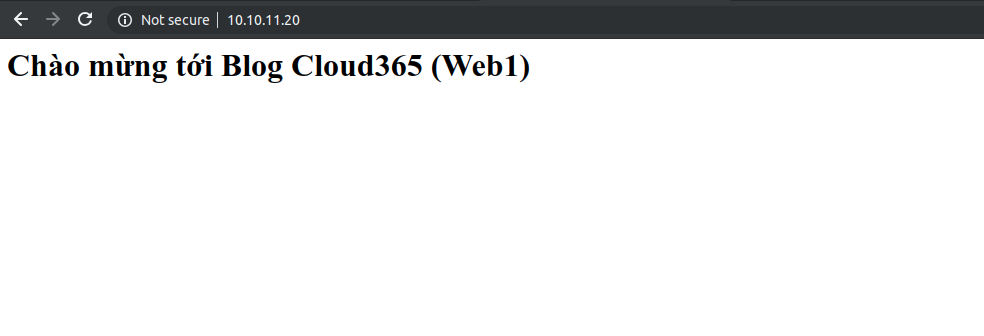
echo '<h1>Chào mừng tới Blog Cloud365 (Web1)</h1>' > /var/www/html/index.html
systemctl start httpd
systemctl enable httpd
Thực hiện tại web2
yum install httpd -y
cat /etc/httpd/conf/httpd.conf | grep 'Listen 80'
sed -i "s/Listen 80/Listen 192.168.199.13:80/g" /etc/httpd/conf/httpd.conf

echo '<h1>Chào mừng tới Blog Cloud365 (Web2)</h1>' > /var/www/html/index.html
systemctl start httpd
systemctl enable httpd
Bước 3: Kiểm tra
Truy cập điạ chỉ http://10.10.11.20:8080/status-web, trang giám sát traffic 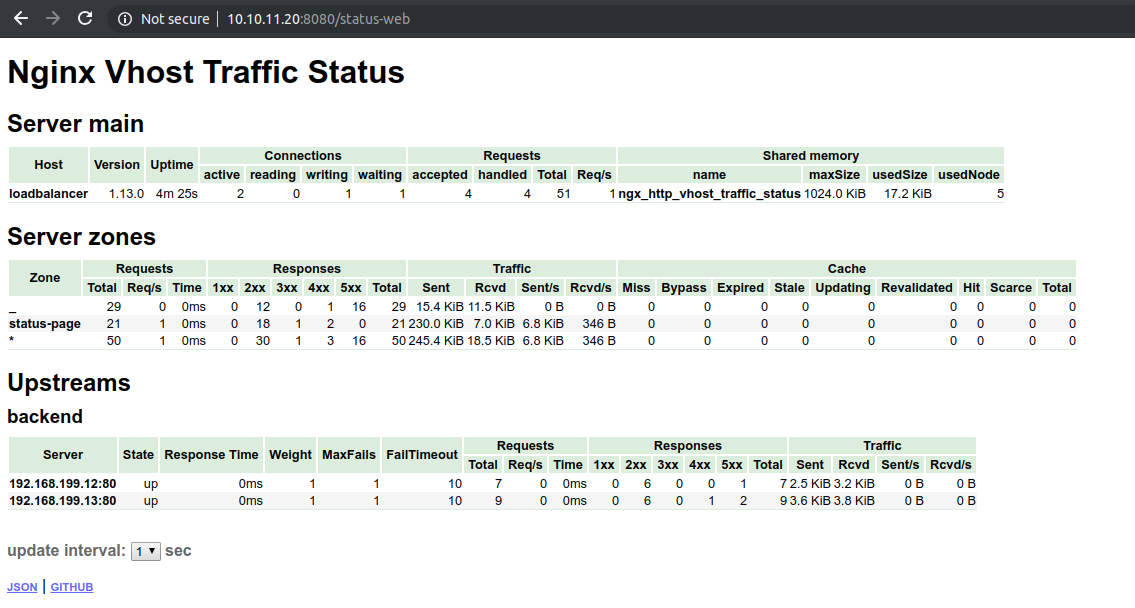
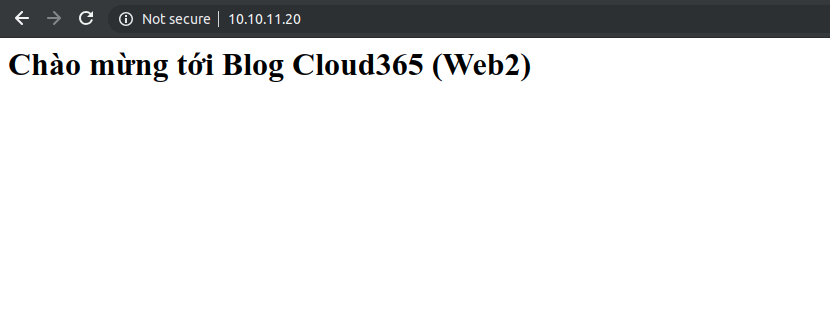
Truy cập http://10.10.11.20, nhấn refresh trang liên tục, các request sẽ tự động chia sẻ sang 2 trang web1, web2theo thật toán round robin
Kết quả lần 1
Kết quả lần 2
có thể tham khảo thêm tại https://kipalog.com/posts/Su-dung-NGINX-nhu-mot-Load-Balancer
https://xuanthulab.net/su-dung-haproxy-lam-de-can-bang-tai-va-server-trung-gian-voi-docker.html